Do-It-Yourself RV Window Replacement Measuring Guide
Taking the time to properly measure for your new window will help to ensure a proper fit and easy installation. To make this as easy as possible, below are step-by-step instructions for this Do-It-Yourself project. You may also download this guide as a PDF file.
Tools needed. Screw Gun, Tape Measure, Putty Knife.
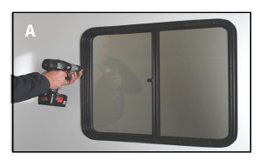
Step 1. Remove the old window.
- Remove the screws around the perimeter of the window frame from inside the vehicle. There will be approximately 12-20+ screws depending on the size of the window. (See photo A)
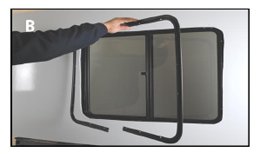
- Once all screws are removed, the trim ring can be taken down and set to the side (See photo B). Then, from inside the vehicle firmly push the window out of its opening. It is recommended that a second person place a hand on the window from the outside of the RV to prevent the window from falling to the ground.
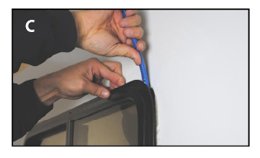
- If all screws have been removed and the window is still firmly held in place, slide a thin putty knife under the exterior window flange and work your way around the window until it can be removed. Be careful not to damage any paint or graphics that are on your vehicle. (See photo C)
Step 2. Measure the rough opening.
- Measure the rough opening in your sidewall, not the old window. Do not try to duplicate the old window dimensions. We will make the appropriate accommodations to properly fit the rough opening dimensions.
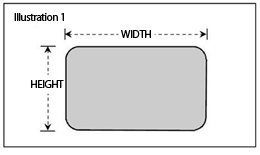
- All measurements must be to the nearest 1/16 inch - Measure twice! Simple rectangles require only 2 measurements (See Illustration 1).
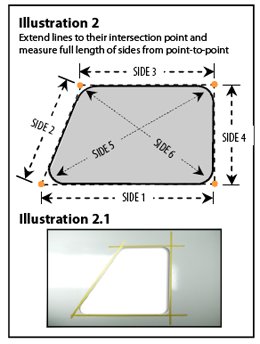
- Parallelogram/Trapezoid shaped windows require 6 measurements (Illustration 2). Use masking tape on the sidewall to extend the measurement lines beyond the radius and to the intersection point (See Illustration 2 and 2.1).
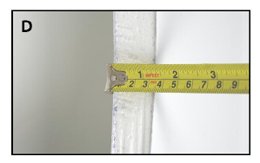
Step 3. Measure sidewall thickness.
- Measure sidewall thickness from the exterior wall surface to the interior wall surface. Do not include the window frame in this measurement. (See photo D)
- Wall thickness typically ranges from around 1-1/4" to 2-1/2".
Step 4. Measure Corner Radius.
Windows with radius (rounded) corners are very common, and most use a 2.5" or 3" radius but don't assume - measure! If you have a square or mitered corner you may skip this step.
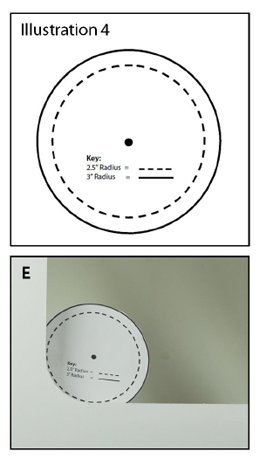
The easiest way to determine corner radius is:
- Print out the radius template at full scale (See in Illustration 4) Click here for a printable version. At full scale the dashed line will have a radius of 2.5" (5" across), and the solid line will have a radius of 3.125" (6.25" across). This can also easily be done by using a compass to draw your own circles.
- Hold the radius template up to a corner in the rough opening for the window and determine which radius most closely matches. This is what radius your window should be. (See photo E)
Step 5. Price and Order a Replacement RV Window.
- Click Here to visit our Instant Pricing page. You will get an instant price quote after you make a few feature selections and input your window measurements. Once you have received a price and are ready to order, our website will walk you through the ordering process.
- Or, feel free to contact us via phone or email. We will be happy to step you through the process and answer any questions you might have. Phone: 800-551-9149 or Email Us.
Disclaimer: It is the consumer's responsibility to ensure the accuracy of the window measurements submitted for order. We assume no responsibility for any incorrect measurements or selections made by the consumer.